DVI – How to Add an Arrow or Edit Photos in RSS DVI
How to Add an Arrow or Edit Photos in RSS DVI
Sometimes a photo needs a little work before you text the inspection to a customer. The editor built into RSS DVI lets you point out defects, fix a sideways shot, or crop out background clutter, all without leaving the inspection. It opens with the arrow tool ready to go, so pointing out a defect takes just a couple of clicks.
Here’s a quick video that shows how quickly you can add an arrow or highlight an area
Opening the editor
- Hover over any image in the checklist, inspection details view, or the audit screen
- Click the “Edit” option to open it full-size with the editor
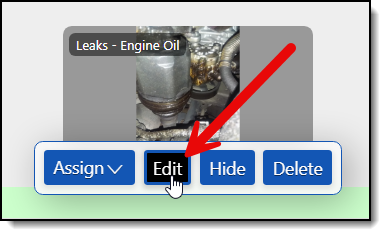
This opens the photo full-screen and shows the editing tools.
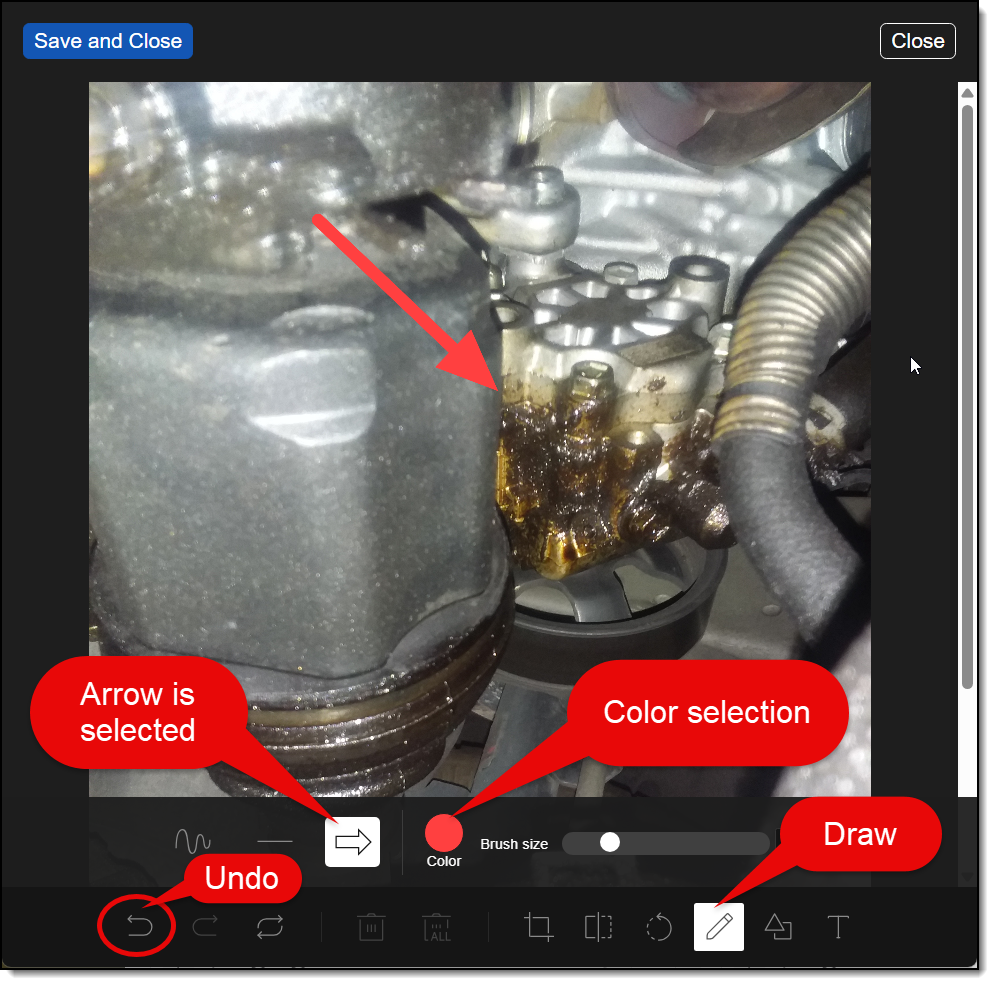
Drawing an arrow to point out a defect
This is the tool you’ll use most, and it’s what’s already selected when the editor opens. An arrow pointing straight at a worn pad or a crack does more than a caption ever will.
- We have set the default to a red arrow, size 10.
- Click near the defect and drag toward it to draw the arrow.
- Add more arrows or select the drawing tool to add freehand drawing.
- Click Save and Close when you’re done. Clicking Close instead will discard your edits.
Tip: Stick to one or two arrows per photo. A photo with five arrows gets confusing fast. If there are multiple issues, take a separate photo for each.
Cropping a photo
Use Crop to remove distracting background or zoom in on the specific issue.
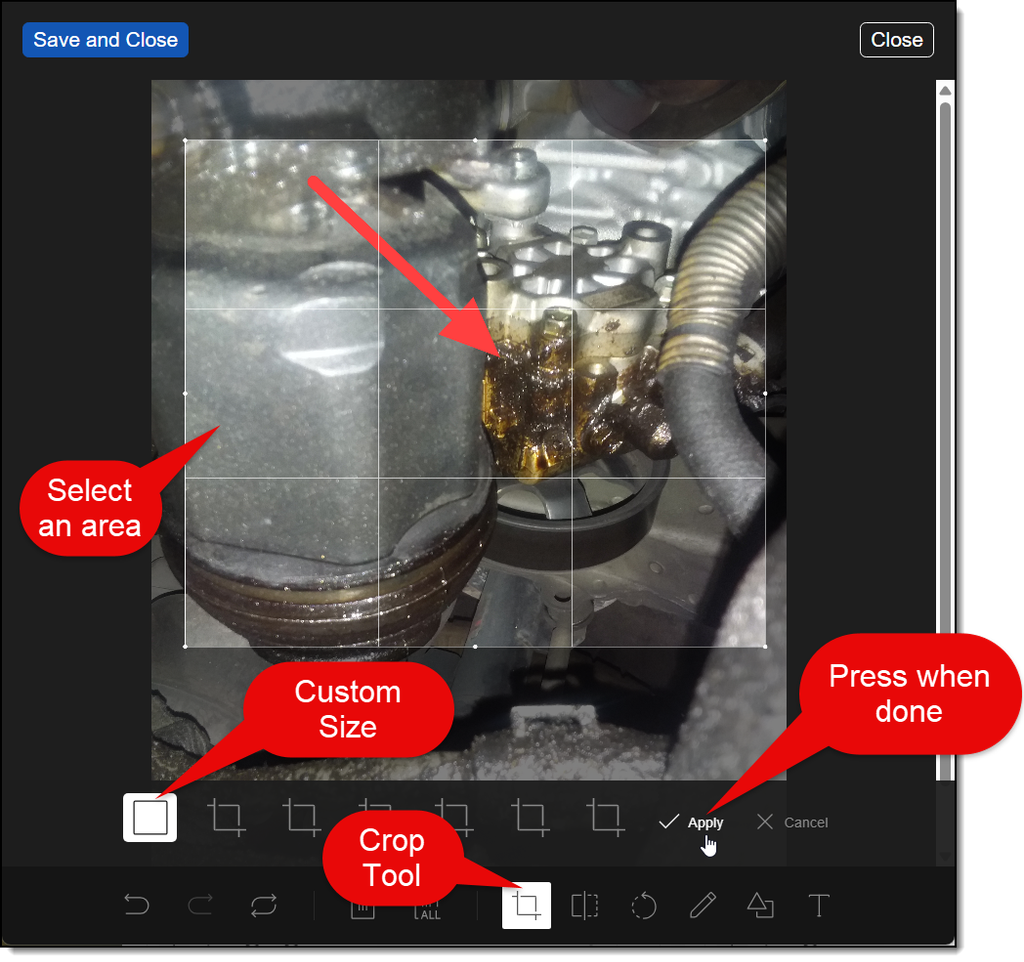
- Click the Crop tool.
- Drag the corners of the box until it frames the area you want to keep.
- Click Apply to lock in the crop.
Rotating a photo
Fixes sideways or upside-down shots, which happen a lot with phone cameras.
- Click the Rotate tool.
- Click the left or right option to rotate in 30-degree steps, or drag the slider for a custom angle.
- Click Apply once it looks right.
Adding shapes
We’ve set the default shapes to highlight a specific area and make it stand out.
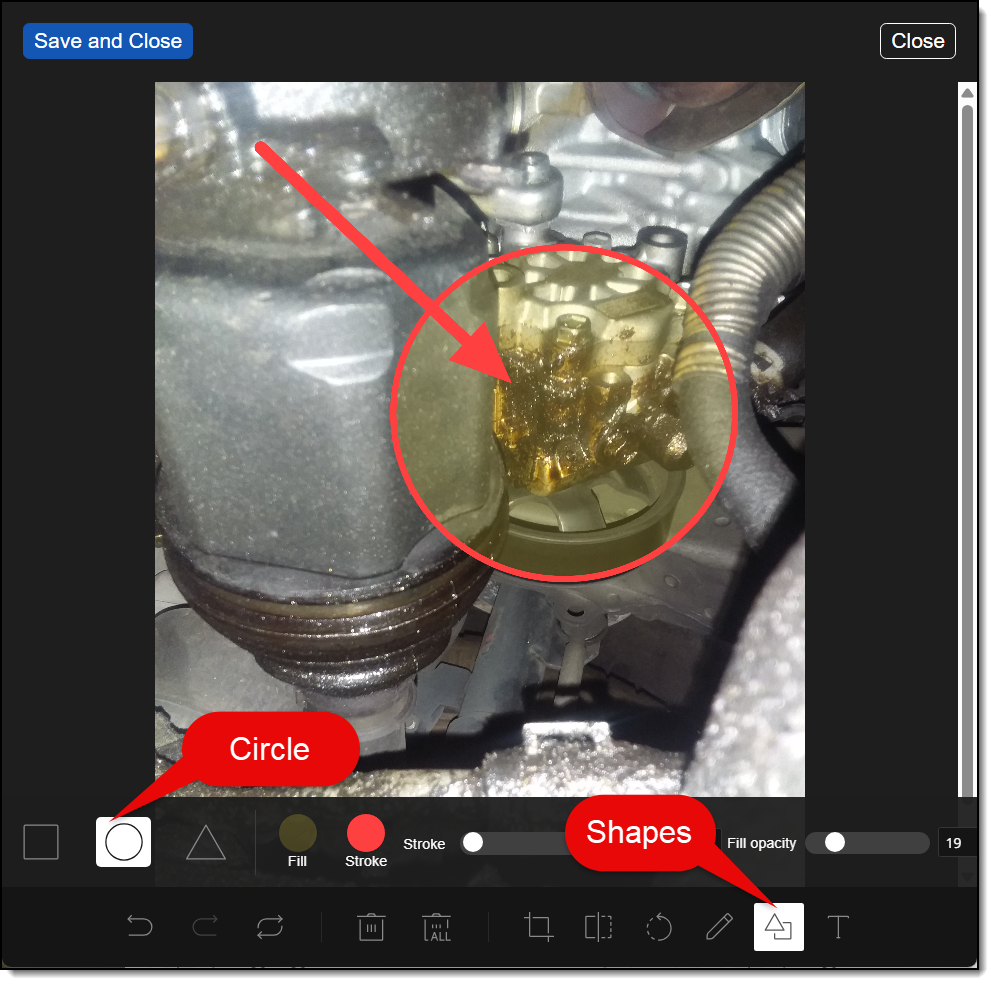
- Click the Shape tool.
- Choose rectangle, circle, or triangle. A red circle with yellow shading is the default.
- Click and drag on the photo to draw it.
- Adjust color and line thickness if needed.
- If you need to move it, uncheck the circle tool, and that will allow you to grab and move the circle
Saving your edits
- Click Save and Close in the top-left of the editor once you’re happy with the changes.
- The edited photo replaces the original in the inspection. The customer sees the marked-up version when you send the report.
Careful: If you click Close instead of Save and Close, you won’t keep any of your edits. Use Close only if you want to back out and start over.
A couple of tips
- You can undo a step with the undo arrow before you click Save.
- You can remove all edits with the trash can icon
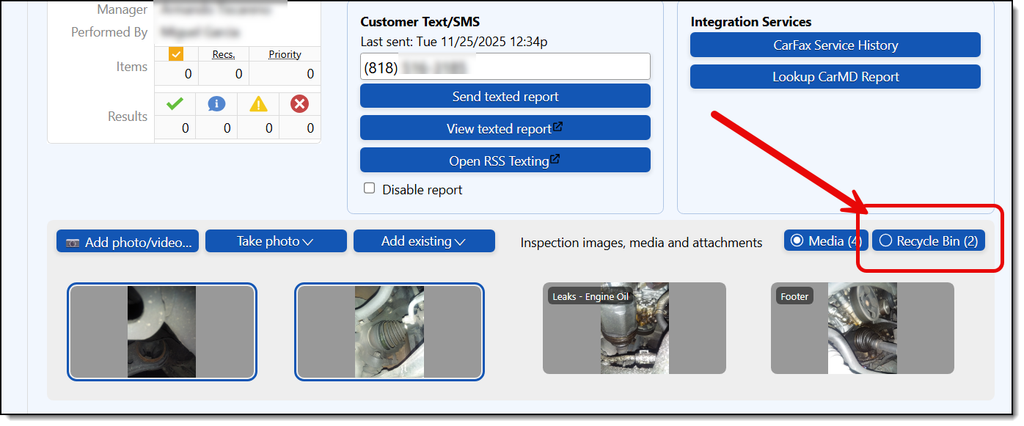
- Once saved, the original unedited photo moves to the Recycle Bin folder. To recover it, open the Recycle Bin from the inspection detail view or the audit screen and restore the photo.