
DVI – Working With Categories
Categories are nothing more than a way to organize tasks. Very simple, you usually name categories after sections of the vehicle you’re working on. Something like Undercar, Underhood, Steering, Etc. Each category should contain multiple tasks.
One thing to remember is to keep this simple. When a mechanic looks at a checklist with 15 categories, each with 5-7 tasks, it looks much larger than a checklist with 5-7 categories, each containing 10-15 tasks. Odd, but you will hear them complain about how much longer it takes. When it reality, it just looks different. So, keep it simple by grouping items accordingly.
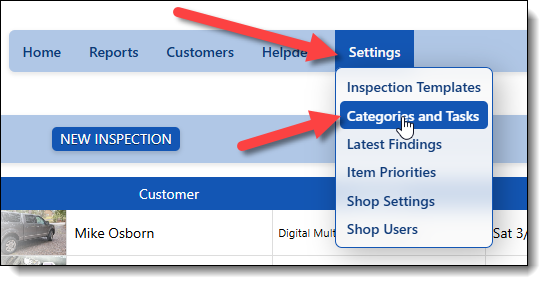
To access your list of categories, go to the settings menu and select “Categories and Tasks.” If you don’t see this option, you may need to get the Shop Owner to upgrade your security settings.
Here’s a list of all of your categories and what you can do with them:
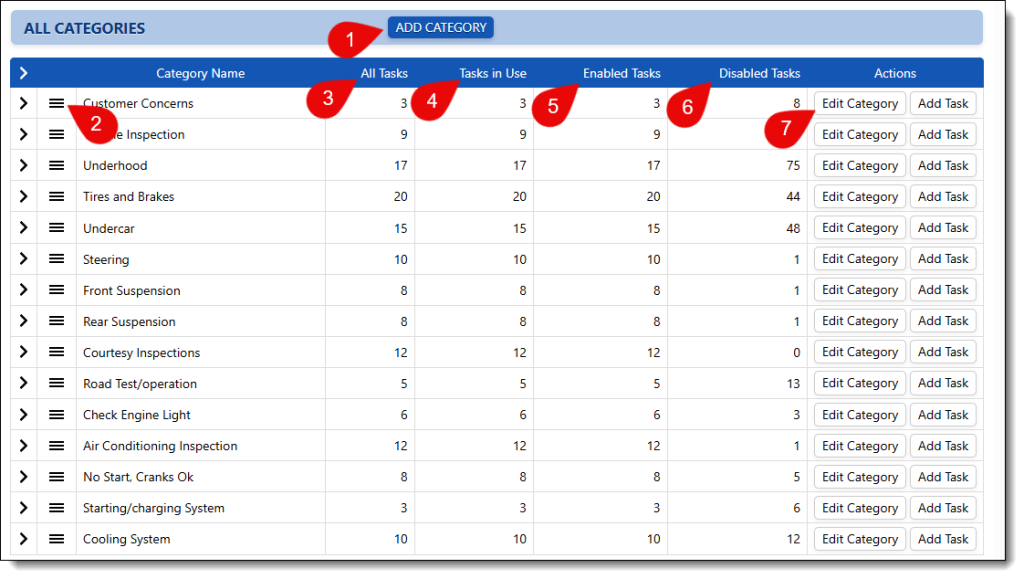
- Add a new category. If you need an additional category, here’s where you add one.
- Once you add a category, it will appear in the list, and you can tap the 3 bars to sort them up or down. Keep in mind that all templates will use this order. Notice that the categories we use for the diagnostic flow sheets are at the bottom to show some separation
- This column tells how many tasks are in this category
- This column shows how many of those tasks are being used. As you make changes to your templates, you may orphan some tasks, causing this to be smaller than the number in the first column
- You may have tasks that have been disabled. This and column #6 show the numbers of enabled/disabled tasks in each category
- The number of disabled tasks
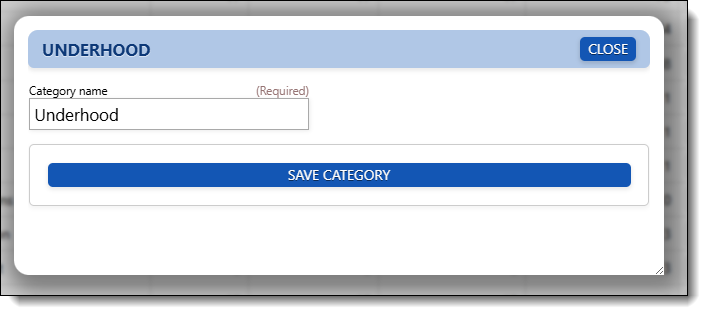
- If you need to change a category name, do it here. This opens this window for making that change:
Working with categories is pretty simple. Let’s move on to editing the tasks now.